Author: Bajtai Krisztina, Vértesy Mónika
2010-10-08
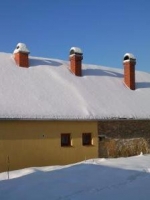
How do the energy-efficient building constructions we have chosen fit in the concept of the passive house? How much will it cost to build a two-story, 107 m2 passive house? What kind of windows and thermal insulation material were used? There really isn’t any chimney?
Passive house is a very well insulated house, almost without any thermal bridge. The resident’s thermal comfort is provided by the hygienically necessary amount of after-heated or after-cooled fresh air, without the use of conventional heating or cooling.
|
Requirements |
|
| • net energy demand for heating |
15 kWh/m2/year |
| • total primer energy consumption |
120 kWh/m2/year |
| • airtightness (if the pressure difference is 50 Pa) |
0,6 1/h |
|
Recommendation |
|
| • U-value of walls and floors |
0,1-0,15 W/m2K |
| • U-value of windows |
0,7-0,8 W/m2K |
Would you like to know more about the requirements? Read the post: How to save the 90 % of your gas bill?
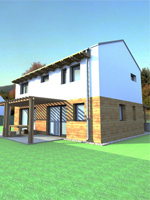
We have already written a lot about passive houses, let’s see a building at last, which was designed according to the passive house concept. This way we can easily demonstrate, what is important and why, what are the main functions. Everybody is curious, how much more expensive is to build a passive house. Each house is unique, so we don’t want to guess, but we can estimate, from how much money could be realized this simply-formed house.
In this project our goal was to design a minimal, energy-efficient house, not an architectural display.
Already at the selection of the site is worth to consult with an architect, because the characteristics of the site can greatly affect the realization of a passive house. For example, if the plot is on a hill, or in a valley, you will have to differ from the basic guidelines, and you will have to come up with specific solutions.
Furthermore you have to observe the outside surrounding environment. The location of the neighboring houses compared to your site (if it is on the southern side, from where we could gain the most of the energy, the neighboring building is too close, and even too high, it casts a shadow over your house, and stops the sunbeam, before it could reach it).
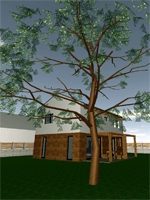
The vegetation is an important factor too. On the north side, the evergreens are suitable, because they protect the “cold” side throughout the year. On the south, deciduous trees should be planted, because during summer, the large canopy provides shade and protects the building from heat load, while wintertime – when it sheds its leaves – the sun-rays can pass through.
In this case, the building was designed on a typical flat, 600 m2 large plot. In the plan, the building is detached and oriented to the south, which is the most ideal case, but in reality it isn’t worth to differ from it, otherwise the requirements are difficult to fulfill.
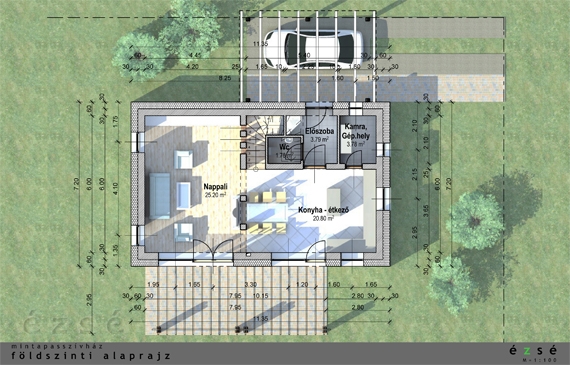
During the design process, we took into consideration the needs of an average person, who wants a more sustainable and cost effective energy efficient living space for himself and his family. Both architectural and engineering point of view, an average four-person family’s needs were taken into account. The goal was a simple and efficient floor plan arrangement. This means, we tried to minimize the corridor areas, so we could save more space, which means that non only the construction costs are lower for the customer, but also plays a role in the sustainability of the building.
The placement of the staircase played central role, it has to be definitely on the “weaker” north side, with the other secondary premises (pantry, mechanical room, toilet, hall). On the south side, on the ground floor are clearly the common areas dominating, the living room, kitchen-dining area; on the first floor are the bedrooms and the shared bathroom.
A bigger mechanical room has been designed next to the kitchen, as to make the passive house operable. The airtightness and the good design aren’t enough, a significant engineering is also necessary, and we need to provide the required space for it.
Take a look at the passive floor plans, the facades and the cross-sections or take a virtual walk!
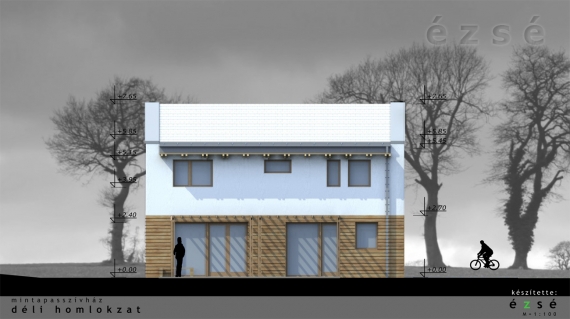
Building a passive house, it is essential that we have to design the whole building whitout thermal bridges. It means that we "wrap" the house and it makes a thermical shell around the building. It includes not only the walls and the roof but the parts which are contiguous to the ground. We have to use insulation on the walls and the slab contiguous to the ground. If we use the general strip foundation the weight of the house distributes on a 30 cm wide surface which none of the insulations can hold. There is a solution to this problem which is the raft foundation, because the thick insulation is under the whole zone of the foundation and the weight of the house distributes on a bigger area. In our passive house it distributes in 82m2 so we can use a heavy duty XPS.
BASF Styrodur 400 C S XPS – G, which can withstand this amount of load.
The external boundary walls were designed using Porotherm 30 N+F bricks with 30 cm thick Austrotherm GRAFIT thermal insulation. Downstairs treated plank floor for external use was chosen, while above the upstairs’ floor Terranova colored plaster was used. In fact, the perfect solution would have been, if there isn’t plane change by the cladding (for the 20 mm thick beveled wood paneling, 30 mm thick cross-ventilation is needed), so by the plastering 50 mm extra insulation were used, which is more expensive, or decrease the insulation by the plank floor, which is more economical, but doesn’t fulfill the PHPP requirements. The positive footing isn’t recommended neither, but in this couple of centimeters the galvanized sheet steel can solve the problem of the drainage.
To bring some "architectural value" to the building, we wanted to construct a roof frame, which is visible from the inside. In this case, the ideal solution is to put the thermal insulation on the top of the rafters. For this, high load-bearing ROCKWOOL Monrock Max E rockwool panels would have been necessary. Because of cost-saving point of view, we wanted to use the normal load-bearing ROCKWOOL Deltarock Plus rockwool thermal insulation, which can be placed only between the rafters. It is true, this causes thermal bridge at the contact point of the rafters, but considering this, the 45 cm thick rockwool thermal insulation of the structure still complies the PHPP requirements. In terms of costs, the "triple" amount of rafters and the insulation in-between is still cheaper, than the high load-bearing thermal insulation.
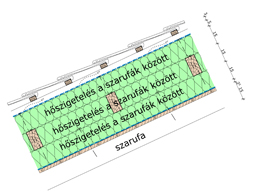
insulation between rafters
MONROCK MAX E
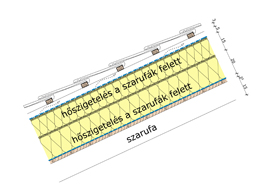
insulation on top of rafters
DELTAROCK PLUS
To meet the needs of the passive house, the window should have low-transmission heat loss and low-emissivity glazing, which can control the solar gains. Uw value quantifies the former, and g value the latter. Be careful while choosing the windows, as many times the indicated U-values aren’t the whole window’s U value, they are referring only the U-value of the glazing (Ug) or the frame (Uf).
For the example house, we asked for bids from the Austrian window manufacturer, Actual. For the north side, Actual Solar frame with enhanced insulated glazing were chosen. The U-value of the frame is 1.3 W/m2K, and of the glazing is 0.7 W/m2K. For the other sides, windows with better thermal insulation were designed: window with Actual Matrix 3 Hybrid type of frame, whose U-value is 0.87 W/m2K, and its glazing’s U-value is 0.6 W/m2K, due to the Super-Kälteblocker technology. This represents a metal-free spacer, which significantly reduces heat loss, so the vapor- and mold-growth can be avoided.
The professional installation of the windows and doors is at least as important as the selection of them.
First of all, care must be taken to the air-tightness. By the passive house, using only polyurethane foam wouldn’t have been sufficient, therefore at the junctions, airtight tape is on the external side of the frame, while the internal side is glued to the wall. The remaining gaps are filled with polyurethane foam.
The second important aspect is the thermal break-free construction, that’s way the window has to accommodate not to the plane of the wall, but the plane of the insulation, with the help of an aluminum profile, after that, it has to be covered back with the insulation.
Of course the price of these windows are about 50 % more expensive, than the conventional windows found on the market. This can be reduced by using cheaper fix windows, instead of tilt and turn windows.
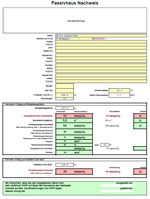
Price details can be found in the passive house estimation
uhwjsmyu


Copyright © é z s é 2009 Terms and Conditions | Privacy policy
é z s é kft.  +36 1 275 41 23 1115 Budapest Kelenföldi út 21. 2. emelet 9.